
Cold air sharpens the senses and changes the rules of exercise, but it doesn’t have to stop you. With thoughtful gear and a little planning, outdoor workouts become livelier and safer than ever. This article dives into the equipment, techniques, and small adjustments that make winter training productive and even enjoyable.
Why winter outdoor training pays off
Training outdoors during the cold months offers benefits you won’t get inside: mental freshness from daylight and crisp air, improved resilience as your body adapts to tougher conditions, and the variety of terrain that challenges balance and stability. The season forces you to consider wind, wet, and temperature in every rep, which can build awareness and movement efficiency.
Physiologically, cold-weather workouts can increase calorie burn because the body works a bit harder to maintain temperature, but that advantage is modest and depends on intensity, duration, and clothing choices. More important is consistency: people who keep training through winter arrive at spring fitter and more confident.
There are trade-offs: risk of slips, frostbite, or poor recovery if you overdress and sweat excessively. Those risks are manageable with the right gear, preparation, and habit of checking conditions before you head out.
Planning your winter workouts

Start with a simple check: weather forecast, expected wind chill, and the surface conditions for your planned route. Wind and wetness matter as much as temperature, and a sunny -5°F day feels very different from a damp 20°F day. Adjust the intensity and duration accordingly.
Think in weekly blocks rather than single sessions. If an icy day prevents a run, swap to a strength session, mobility work, or a snowshoe hike. Flexibility keeps progress steady and prevents frustration from unavoidable weather interruptions.
Timing matters. Midday runs often offer the warmest temperatures, but early morning might fit your schedule better. Also consider light: shorter days mean less visibility, so plan routes with good lighting or carry a headlamp and reflective gear when necessary.
Layering system: the foundation of winter comfort
Layering is the single most important concept for winter sportswear because it lets you adjust to changing intensity and weather. The three-layer model—base, insulating, and shell—remains the best framework for movement-based workouts where body heat fluctuates rapidly.
Pay attention to fit and fabric. Layers should be snug enough to trap air without restricting movement. Fabrics that retain moisture next to the skin will make you colder, so choose moisture-wicking base layers and breathable shells.
Layers also serve specific purposes: temperature control, moisture management, and protection from wind and precipitation. Learn to add or remove layers efficiently during transitions like long warmups, steep climbs, or recovery intervals.
Base layers: fabrics and fit
The base layer’s job is simple: move sweat away from your skin. Merino wool and synthetic blends are the main choices. Merino feels softer and resists odor, while synthetics dry faster and are usually less expensive.
Fit should be close but not tight. Too loose and the fabric won’t wick efficiently; too tight and it can compress circulation or chafe. For high-intensity efforts a thin, breathable synthetic or a lightweight merino works well.
For lower-intensity sessions or very cold starts, consider a slightly thicker base layer or a merino midweight. A pocketed base layer makes carrying a small gel or key easier without adding bulk.
Insulation layers: warmth without bulk
Insulation traps warm air created by your body. Fleece and lightweight synthetic fill are popular because they keep insulating power when damp and compress well under an outer shell. Down is extremely warm but loses much of its loft when wet, so it’s best for cold, dry conditions or post-workout layers.
Choose an insulating layer based on activity intensity. For steady aerobic training, a thin fleece or jersey may suffice. For low-movement activities like standing drills or post-run cooldowns, a thicker synthetic or down midlayer becomes essential.
Design details matter: zip vents, thumbholes, and articulated cuts improve comfort during dynamic movement. Pockets positioned to remain accessible under a shell add convenience for gels, phone, or gloves.
Outer shell: protection from wind and precipitation
The outer shell keeps out wind, rain, and snow while letting moisture escape. For most winter workouts, a lightweight, breathable softshell works best because it balances protection with ventilation. Hardshells provide full waterproofing but can trap heat during high-output sessions.
Look for features like a helmet-compatible hood if you cycle, pit zips for ventilation, and an adjustable hem to lock out drafts. Seams and zippers are small details that define long-term comfort and durability.
Waterproofing is not a guarantee of warmth. A waterproof jacket can keep you dry but might allow heat to build if it lacks breathability. Choose a shell that fits your typical exertion level and local weather patterns.
Hands, head, and feet: critical details for comfort
Extremities lose heat fastest and show it first. Protecting your hands, head, and feet keeps the rest of your body comfortable and focused. Small mistakes here lead to short workouts or compromised technique.
Plan for versatility: pack a lighter pair of gloves for warms-ups and a thicker pair for standing or cool-downs. For feet, consider warmer socks and change them immediately after training if they become wet.
Proper fit matters. Gloves that are too tight reduce circulation, and shoes that are too loose increase risk of blisters and slips on ice. Make adjustments before you leave the house—it’s much harder to fix discomfort outdoors.
Footwear and traction: boots, trail shoes, spikes
Shoes are your anchor on winter terrain, so choose based on surface and intensity. Lightweight trail shoes with aggressive lugs work for packed snow and mixed trails. Waterproof versions help in slushy conditions but can trap moisture during steady runs.
For ice and hard-packed surfaces, traction devices—microspikes or studs—are inexpensive and highly effective. They clip onto shoes and provide predictable grip for running and hiking. For deeper snow, insulated winter running shoes or snowshoes are better choices.
If you commute or walk on cleared sidewalks, consider a winterized daily trainer with a grippy rubber compound. Rotate shoes if possible: letting footwear dry fully between sessions extends lifespan and keeps insulation performance consistent.
| Surface | Recommended footwear | Pros | Cons |
|---|---|---|---|
| Packed snow / trails | Trail shoes with lugs / winterized trainers | Good traction, responsive | Can get wet in slush |
| Ice / hardpack | Microspikes / studs over shoes | Excellent grip | Not for deep snow |
| Deep snow | Snowshoes or insulated boots | Floatation and warmth | Heavier, slower pace |
Gloves and mittens
Hands need dexterity for zippers, watches, and phone use, but also insulation for warmth. Consider a thin liner glove under a windproof mitten for versatile layering. Mittens are warmer because fingers share heat, but they limit fine motor control.
Materials matter: touchscreen-compatible gloves are convenient, but the conductive fabric can compromise warmth in some designs. Waterproof shells protect from slush, while breathable softshells let sweat escape during hard efforts.
Keep backup gloves in a pocket or car; changing to a dry pair during cooldown prevents rapid heat loss. Also consider sticky palms or silicone grips for better hold on poles or bike handles.
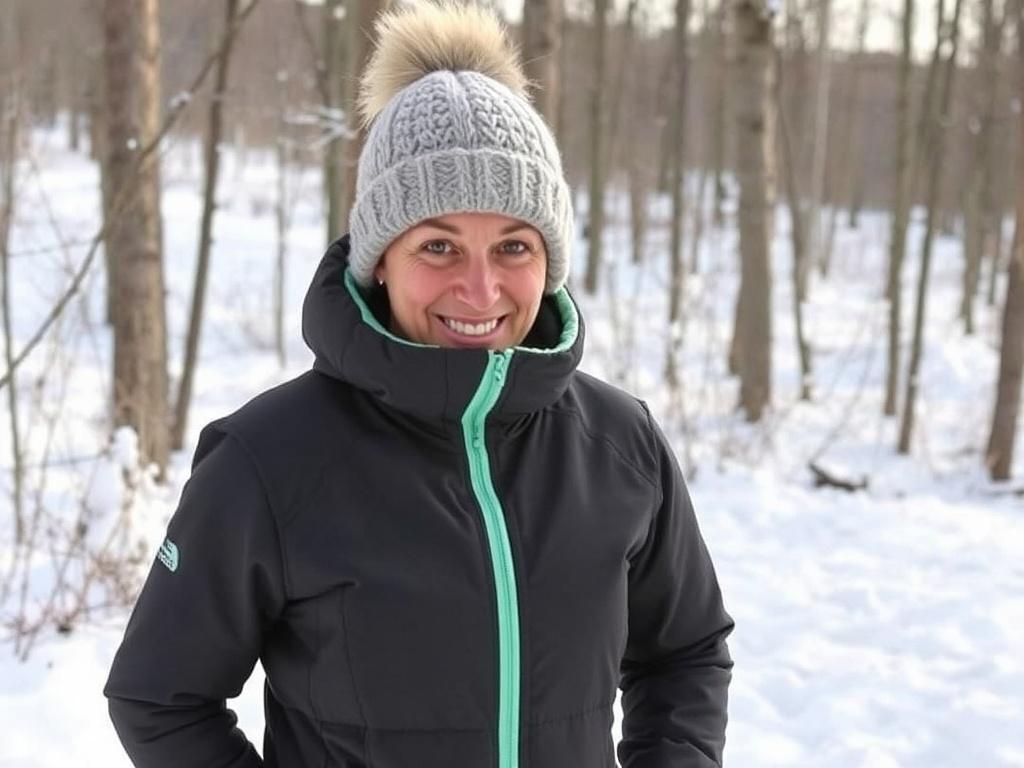
Hats, buffs, and balaclavas
About half your body heat escapes through the head, so a good hat is non-negotiable for cold sessions. Lightweight merino or synthetic beanies work well for runs. For very cold or windy days, add a balaclava or neck gaiter for face protection.
Layering still applies: a thin cap under a hood or helmet adds warmth without bulk. Choose breathable fabrics that dry fast when damp from sweat. A buff can be pulled down for ventilation or pulled up for wind protection, making it one of the most versatile pieces.
Avoid cotton for these pieces. When wet, cotton chills quickly and holds moisture against skin. Stick with merino, polyester blends, or technical fabrics designed for cold activity.
Accessories and tech that matter
Small items often make the biggest difference. Reflective strips, a headlamp, and a small first-aid kit extend safety and comfort. Electronics like GPS watches should be used with care because cold reduces battery life.
Carry spare batteries or a power bank in an insulated pocket close to your body to prevent rapid depletion. Phone cases that insulate and waterproof your device are inexpensive insurance for navigation and emergency contact.
Audio choices deserve thought. Earbuds that block wind noise help maintain awareness better than loud music. Bone-conduction headphones let you hear traffic and environmental cues while enjoying coaching or music.
Specialized gear for different winter workouts
Not every activity requires the same setup. A winter cyclist needs different protection and hardware than a runner doing interval repeats. Matching gear to activity prevents over- or under-dressing and keeps training effective.
Low-impact cardio like skiing or snowshoeing allows for bulkier insulation because intensity is steadier and body heat distribution differs. High-intensity interval training outdoors needs breathable layers to avoid sweat buildup and chilling during rest phases.
Strength training or plyometrics in a park asks for footwear with stable soles and gloves with good grip. Bring a warm layer for breaks—standing still after explosive sets rapidly lowers body temperature.
Running
Runners need a balance between breathability for sustained effort and wind protection for exposed stretches. A light base layer, thin insulating midlayer, and windproof shell often do the trick. Add microspikes for icy paths and consider gaiters for deep snow.
Adjust for effort: start slightly warmer than you think you need because you will warm quickly. Carry small essentials—phone, keys, ID—in a chest pocket to avoid overheating the waist area and to keep items accessible.
Shoe choice matters more in winter than summer. Tires for your feet—the rubber compound and lugs—determine confidence and cadence when footing is uncertain. Rotate shoes and let them dry fully after each outing.
Cycling
Cycling in winter trades moisture management for windproofing. A windproof bib or tights, insulated shoe covers, and a waterproof shell for wet days are core pieces. Layering under a helmet and using anti-fog visors helps with visibility and comfort.
Gloves should retain brake and gear control; consider lobster-claw styles that combine warmth with better dexterity than traditional mittens. Studded tires or lower tire pressure improve traction on ice and packed snow.
Visibility is crucial: flashing rear and front lights, reflective stickers, and a bright outer layer dramatically reduce risk, especially in low-light conditions common in winter commutes or early rides.
Cross-country skiing and snowshoeing
These activities permit heavier insulation because movement tends to be continuous and steady. Breathable midlayers combined with light waterproof shells keep moisture moving outward while trapping warmth efficiently. Avoid too many heavy layers that limit mobility in classic skiing motions.
Socks designed for snowsports and boots that match the activity deliver comfort and warm feet for long outings. Carry a small repair kit for bindings and a pack with water and snacks that won’t freeze—insulated bottles or hydration bladders with insulated tubing help.
These sports also reward route planning: packed trails are faster and safer, but deep, fresh snow provides better resistance training. Switch between intensities to manage sweat and preserve insulation.
Warming up, cooling down, hydration, and nutrition

Warmups in winter demand special attention because cold muscles are more injury-prone. Start dynamic mobility drills indoors or in a sheltered area, then gradually increase intensity before committing to sustained efforts. A proper warmup reduces the temptation to overdress and sweat excessively.
Cooldowns can chill you fast. Bring a lightweight warm layer to slip on immediately post-exercise, even if the effort felt easy. Consider warm fluids or a thermos for longer sessions; sipping something warm can aid recovery and morale.
Hydration matters year-round. Cold suppresses thirst, which can lead to underhydration. Carry insulated water bottles to prevent freezing and establish a habit of drinking on schedule rather than waiting for thirst cues.
Safety, visibility, and emergency kit
Low temperatures amplify the consequences of an accident. Bring a basic emergency kit: an emergency blanket, lighter or waterproof matches, a small whistle, and a compact multi-tool. Keep the kit in a waterproof pouch close to your body to keep items usable if you need them.
Visibility is a non-negotiable safety factor. Reflective vests, LED lights on headbands or shoes, and bright outer layers make you visible to drivers and other outdoor users. Choose lighting with both steady and flashing modes to increase detectability in varied conditions.
Know the area and let someone know your plan when venturing into remote zones or during extreme weather. Share a rough timeline and check in after the session, especially when temperatures drop well below freezing.
Maintenance and care of winter gear
Cold-weather gear requires a little more care than summer pieces. Waterproof membranes lose effectiveness if dirt or body oils clog the fabric. Clean and re-treat shells according to manufacturer instructions to restore breathability and water repellency.
Dry insulation fully before storage; damp down or synthetic fill left compressed will lose loft and insulating capacity. If a pair of gloves or socks gets soaked through, dry them near—but not on—heat to avoid damaging materials.
Store batteries warm and use insulated pockets to prevent cold-related performance drops. Replace worn traction devices and shoes before they fail when you need them most, because old rubber and lugs stop gripping safely on ice.
Practical packing list and sample outfits

Prepare for a variety of conditions with a compact, purpose-driven kit. Use pockets and compression to keep items accessible and minimize flapping layers that can cause chafing. A checklist reduces the chance of leaving something critical behind.
- Thin base layer (merino or synthetic)
- Midweight insulating layer (fleece or synthetic)
- Windproof/water-resistant shell
- Running shoes with good tread or microspikes
- Insulated gloves + thin liners
- Hat and neck gaiter or balaclava
- Headlamp and reflective elements
- Insulated water bottle and quick snack
- Small emergency kit and phone in waterproof case
Sample outfit for a 45–60 minute high-intensity run at around 20°F (-6°C): thin merino base, lightweight insulating hoodie, windproof shell with pit zips, thin gloves with liners, breathable hat, trail shoes, and light microspikes.
Sample outfit for a moderate 90-minute snowshoe hike at 10°F (-12°C): merino base, synthetic midlayer, insulated softshell, insulated hiking boots, thicker socks, full mittens for breaks, and a balaclava. Carry heated snacks and an extra insulating layer for the summit or breaks.
Buying tips and budget options
Quality gear often costs more upfront but lasts longer and performs better in real conditions. Prioritize purchases that influence safety and comfort the most: footwear, a breathable shell, and insulating layers. These items repay their price in use.
Look for end-of-season sales and last year’s models for good deals. For items like gloves, hats, and base layers, mid-range brands often perform comparably to premium labels. Test fit and comfort before you buy when possible—return policies matter.
DIY tricks help on a budget: use a thin synthetic base layer under a windbreaker for short runs, and add reflective tape to existing outerwear for visibility. But don’t skimp on traction devices or footwear—those protect you and prevent expensive injuries.
Adapting to extreme cold and special tips
When temperatures plunge well below freezing, small adaptations become critical. Limit exposed skin, shorten the session length, and choose routes near shelter or transportation. High-output intervals generate heat but also sweat, so balance effort to avoid overcooling during rest periods.
Pay attention to wind chill, which can change risk profiles dramatically. A calm -10°F day might be manageable, while -10°F with wind becomes dangerous for exposed skin. Carry communication and navigation tools in case conditions change suddenly.
Layering strategy shifts in extremes: prioritize windproof outer layers and insulated pockets for phones and batteries. Consider hand warmers for long stops, and pre-warm equipment like batteries in an inner pocket to extend usability.
Common mistakes and how to avoid them
Overdressing is surprisingly common—people put on too many bulky layers and sweat excessively, then cool rapidly during cooldown. Start slightly cooler than you think you need and layer up once you warm. Use zippers and vents rather than removing entire layers mid-workout.
Another mistake is ignoring footwear and traction. Shoes that perform all year are rare; winter-specific soles or removable traction devices make the difference between a confident stride and a cautious shuffle. Test traction on familiar terrain before heading into technical routes.
Finally, many underestimate the importance of visibility. Short winter days and low-contrast landscapes make you hard to see. Add lights, reflective strips, and bright colors to any kit and treat visibility as essential safety gear rather than optional flair.
Personal experience: lessons from winter training
I learned early that the right hat and dry socks are priceless. On a January dawn run that started at -8°F, I dressed warm, shed a layer after the first mile, and stashed it—only to regret not carrying a spare pair of socks after stepping through a slushy puddle. A quick shoe change at a coffee shop saved the run, and that small inconvenience sparked my habit of carrying backups.
Another memorable session came during a sudden thaw where packed snow refroze into glassy ice. Microspikes transformed the route from treacherous to reliable, and the confidence to push pace returned immediately. That experience convinced me that small traction devices are worth the investment and always go in my pack come winter.
Over years of coaching groups through cold conditions, I’ve seen the same pattern: athletes who prepare for variable conditions maintain consistency and morale. They have systems—layering, hydration, quick-check weather routines—that reduce decision fatigue and keep workouts productive.
Quick checklist before you step outside
Before you leave, run a short mental checklist: route, forecast, layers, traction, lights, hydration, and emergency contact. This ritual takes two minutes and prevents 90 percent of avoidable problems.
Check battery levels and tuck electronics into insulated pockets. If conditions look marginal, choose a route with escape options and shorter loops that keep you close to shelter or transport.
Mentally set boundaries for that day: decide the longest you’ll go or the maximum intensity. Storms and sudden temperature drops can change a good plan into a risky one, and a pre-set limit helps you make smart choices without stress.
Training outside in winter demands more planning than fair-weather workouts, but the return on that investment is steady progress, mental clarity, and a deeper appreciation for movement in all seasons. With the right gear and a few habits—layering, traction, visibility, and an emergency kit—you can keep training safe and satisfying through the cold months, arriving in spring fitter and more resilient than before.