The bench press is one of those lifts that attracts equal parts admiration and fear. When done well, it’s a compact test of upper-body strength; when done poorly, it’s a fast track to shoulder pain and stalled progress. Whether you’re chasing a new one-rep max or simply want a safer, more productive workout, solid mechanics matter—and even a few small changes can make huge differences in results and resilience.
Why precision matters
Force follows technique. A narrow focus on adding weight without refining mechanics often produces short-term gains, then plateaus or injury. Precision in setup, bar path, and timing allows your muscles, tendons, and nervous system to work efficiently together.
Beyond immediate strength, proper benching builds durable joint positions and teaches your body to transfer power safely. That’s why coaches emphasize movement quality as much as load progression; the better your technique, the less you waste energy and the more you can recover between sessions.
Anatomy and what the bench press trains
Understanding which muscles do the work helps you prioritize drills and accessory movements. The bench press primarily targets the pectoralis major, anterior deltoids, and triceps brachii, but it’s supported by scapular stabilizers, lats, and leg drive.
Small muscles like the rotator cuff and serratus anterior may not move the bar directly, but they keep your shoulder safe under load. Ignoring them is like building a house on a shaky foundation—eventually, something will shift.
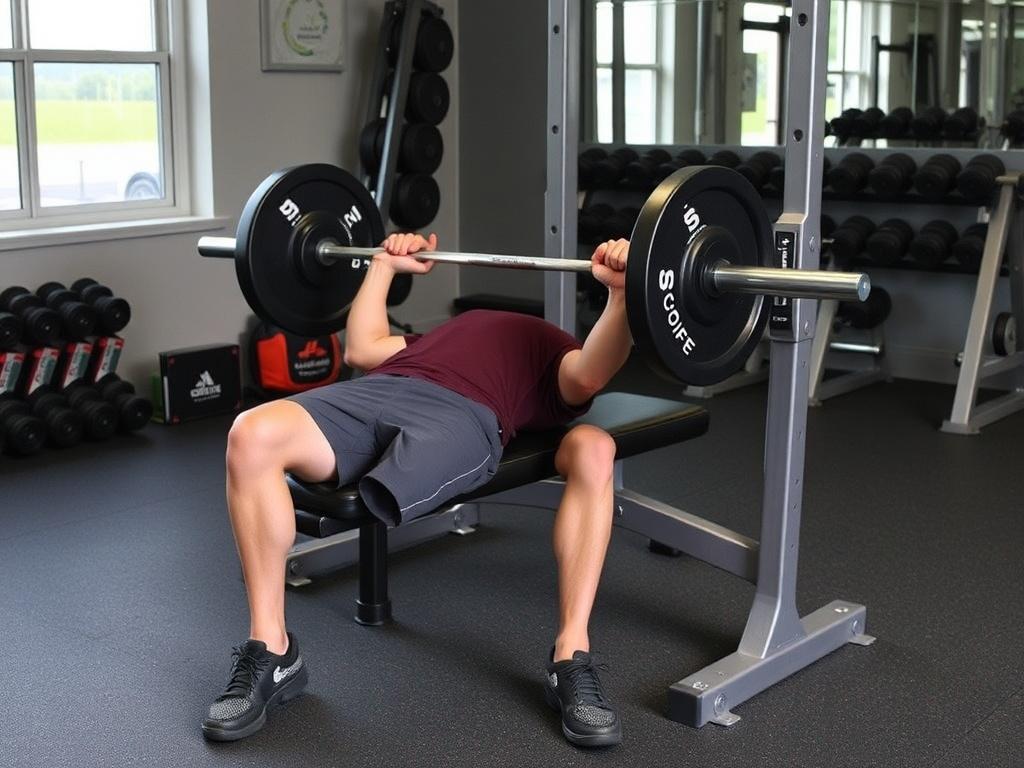
Setup: the foundation of every successful rep
A reliable setup reduces variability rep to rep and is the single best place to invest practice time. Think of it as building a consistent launchpad: foot placement, torso angle, and scapular position all combine to create stable leverage.
Learn a setup that fits your anatomy and stick to it. When you change shoes, bench, or fatigue levels, you should still be able to reproduce the key positions that make your best lifts possible.
Foot placement and leg drive
Foot position is surprisingly influential. Your feet should be planted and stable, generating a posterior chain tension that travels through your hips into your torso. This leg drive doesn’t push the bar with the legs alone, but it transfers force into the press for more efficient output.
Experiment with foot width and whether you tuck your heels under the bench or keep them flat on the floor. Lifters with longer legs often prefer a more tucked position; those with shorter limbs can usually keep feet flat. The goal is consistent, powerful contact with the floor every rep.
Back arch and shoulder blades
A natural, controlled arch is functional. It shortens the range of motion and places the chest in a stronger mechanical position. However, the arch should come from thoracic extension and tight glutes, not from hyperloading your lumbar spine.
Retract and depress your scapulae—pin them down and together—before unracking. This creates a stable platform for the shoulder and prevents the bar from wandering. Once set, maintain that tightness through the descent and press, breathing around your brace so tension doesn’t leak away.
Grip width and wrist position
Grip width changes the emphasis between chest, shoulder, and triceps. A wider grip shifts load to the pectorals and shortens bar travel, while a narrower grip increases triceps demand and lengthens the path. Find a width that feels powerful and pain-free for your shoulders.
Wrap the bar into the heel of your palm so your wrist and forearm form a straight line. Avoid letting the wrist collapse backward under load; a stable wrist gives better control and reduces stress on the joint. Small adjustments in knuckle orientation—slight external rotation of the palms—often improves comfort.
| Grip width | Primary emphasis | Typical use |
|---|---|---|
| Narrow (shoulder-width) | Triceps, anterior deltoid | Lockout work, triceps development |
| Medium (slightly wider than shoulders) | Balanced chest/triceps | Main training grip for many lifters |
| Wide (hands near the rings) | Pectorals | Powerlifting-style, reduces ROM |
Bar path and tempo
Bar path is a conversation between physics and anatomy: it should travel in an efficient arc that leverages your strongest joint angles. For most lifters, the bar descends to mid-chest—just below the nipple line—and then travels slightly back toward the rack as it rises.
Tempo matters as much as path. A controlled descent builds tension and positions the bar, while an explosive press requires that tension to be pre-loaded. Working with varied tempos—slow eccentrics, paused reps, and explosive concentric efforts—builds a fuller strength profile.
Breathing and bracing

Breathing is not just for oxygen; it creates intra-abdominal pressure and stabilizes the spine. Take a deep breath into your belly and ribcage before you unrack, brace like you’re about to be punched, and hold that pressure until the rep is finished. Exhale gradually or sharply as you lock out, depending on the set and load.
Use the Valsalva maneuver strategically on heavy singles and low-rep sets, but avoid breath-holding on high-volume work unless you’re accustomed to it. Bracing should be consistent—if your tension drops, so does your lift quality and safety.
Common mistakes and how to fix them
Many benching issues come from small, repeatable errors rather than dramatic failures. Below are typical mistakes, why they undermine performance, and practical corrections to try during warm-ups and technique sets.
Flared elbows
Elbows that flare wide create excessive stress on the shoulder joint and weaken your pressing leverage. Instead, aim to tuck the elbows slightly toward the body, roughly 45 degrees from your torso. That angle can shift force through your lats and triceps, protecting the shoulder while increasing pressing power.
Practice with lighter loads and focus on keeping the elbow path stable. Video your sets from above or at an angle to objectively assess elbow movement and adjust accordingly.
Bouncing the bar off the chest
Bouncing is risky and undermines technical proficiency. It reduces time under tension for the muscles meant to control the descent and can transfer unpredictable forces to connective tissues. Train control with tempo work: slow the descent and pause briefly on the chest to build strength in the receiving position.
If you’re a powerlifter practicing legal techniques, use legal touch-and-go variations sparingly and only after mastering paused work. For most trainees, a controlled touch and immediate press produces better strength carryover and safety.
Rushing setup
Rushing into a lift means losing reproducible tension. If you move the feet, arch, or scapulae differently each set, the bar path and leverage shift. Spend 10–20 seconds building the same tight setup every rep—plant, brace, inhale, and then unrack. Consistency compounds into better strength tests and fewer missed lifts.
Use the same cues every session: “feet, chest, shoulders, arch” or your own compact chain of reminders. Rushing is cheap and costly at the same time; slow the setup for faster progress.
Programming for progress: load, volume, and frequency
Technique and training variables are best married in a plan. Strength gains come from progressively increasing stress while allowing adaptation. That means manipulating load, volume, and frequency according to your goals and recovery capacity.
For novice lifters, frequent practice with moderate loads builds both skill and size. Intermediate and advanced athletes often benefit from block periodization: weeks that emphasize volume, weeks that emphasize intensity, and planned recovery phases to consolidate gains.
Basic progression models
- Linear progression: Add small load increments each session. Works best for beginners.
- Wave loading: Alternate heavier and lighter sessions within a week to build strength and freshness.
- Block periodization: Build volume for base, transition to heavy intensity, then taper or deload.
Pick one model, apply it consistently for several weeks, and only change when progress stalls. The most complex program cannot outwork sloppy technique or inconsistent effort.
Accessory movements that support the bench

Accessory work fills gaps and shuttles strength to the weak links of your bench. Choose exercises that target the triceps, upper chest, lats, rear delts, and scapular stabilizers. Work these with intention—don’t just add random movements to kill time.
Good accessory choices include close-grip bench presses, weighted dips, overhead presses for shoulder health, heavy rows for lat strength, and face pulls or band work for scapular stability. Strengthen the whole chain, not just the pressing muscles.
Sample 8-week bench program
Below is a condensed template you can adapt. Start with conservative loads—your working sets should challenge you but not destroy technique. Deload or reduce volume if fatigue accumulates.
| Week | Session A | Session B | Notes |
|---|---|---|---|
| 1–2 | 4×6 @ 70% + accessory volume | 5×5 @ 72% + tempo pauses | Build technique and volume |
| 3–4 | 5×4 @ 75% + close-grip sets | 6×3 @ 78% + paused reps | Raise intensity, keep technique tight |
| 5–6 | 5×3 @ 82% + heavy accessory | 4×2 @ 88% + speed work | Near-peak phase |
| 7 | 3×2 @ 90% + light accessories | 3×1 @ 92% + technical focus | Peaking week |
| 8 | Testing or deload | Recovery | Assess progress and recover |
Safety, spotting, and equipment
Safety is non-negotiable. If you lift near failure, always have a competent spotter or use safety arms. When training alone, use a power rack with pins set to catch the bar at chest level and practice unracking and re-racking smoothly to avoid scrapes or shocks to the shoulders.
Equipment such as a bench shirt, wrist wraps, or specialty bars have their place, but they also change mechanics. For most trainees, a simple flat bench, quality barbell, and plates are sufficient. Wrist wraps offer extra joint support; use them selectively rather than as a crutch.
Spotting cues and etiquette
If you’re spotting, keep your hands near the bar but avoid grabbing unless needed. Communicate with the lifter: decide on words or gestures that mean “help” versus “lift normally.” A good spotter is predictable, quiet, and prepared to act without taking the lift away prematurely.
Lifters should request help clearly—say how many reps you’re attempting and where you’d like assistance. Mutual respect in the gym keeps sessions productive and safe for everyone.
Variations and when to use them
No single variant solves every problem. Use competition-style benching to maximize raw pressing power, but cycle in variations to address sticking points and muscle imbalances. Variations also reduce repetitive stress and keep training fresh.
- Paused bench: builds strength off the chest and improves control.
- Close-grip bench: targets triceps and improves lockout power.
- Incline bench: emphasizes upper chest and front deltoids.
- Board press: isolates lockout range without full ROM strain.
- Spoto press: pauses a few inches off the chest to attack the mid-range.
Troubleshooting: what to do when progress stalls
When numbers stop moving, treat the problem like an experiment rather than a calamity. Collect information: how’s your sleep, nutrition, stress, and recovery? Look at volume and intensity—did you pile on too much without accommodation?
Change one variable at a time: reduce frequency for a week, swap in paused reps for two, or add more triceps work. Small, deliberate adjustments usually yield clearer signals than radical program overhauls.
Common pain points and how to address them
Shoulder irritation, elbow discomfort, and pec strains are among the most common complaints. If pain arises, back off load and volume immediately and diagnose whether it’s tendon-based or structural. Consult a healthcare professional for persistent pain, but don’t ignore early warnings.
Prehab is cheap insurance: band pull-aparts, face pulls, external rotation work, and serratus activation help maintain scapular health. Mobility work for the thoracic spine and lats improves positioning and reduces compensatory strain on the shoulder joint.
Competition benching: rules and strategy
If you plan to compete, understand the federation rules for grip, touch, and leg drive. Comp benching often rewards a very efficient, narrow bar path and tightness that’s different from gym-style pressing. Practice commands, wear the gear you’ll use in competition, and simulate meet conditions—single attempts under rest periods, disciplined warm-ups, and maximal focus.
Strategize attempts based on what you can reliably hit in training, not on charismatic bravado. Pick an opener that’s safe and inspiring, a second that builds, and a third that challenges but is plausible. Meet-day adrenaline is real; conservative traffic planning yields more PRs than reckless ambition.
Nutrition, recovery, and lifestyle for bench gains
Strength progress depends heavily on recovery. Aim for sufficient protein intake, consistent calories to support your training phase, and quality sleep. Hydration and electrolytes play quieter but important roles in performance and injury prevention.
Periodize your life around your training blocks when possible: prioritize heavier sessions on days with fewer stressors, and use lighter or technical sessions when work or family demands are high. Training is a long-term process; short-term sacrifices for consistency pay off more than sporadic maximal efforts.
My experience: applying technique to real gains
I learned the value of setup the hard way. Early in my training I would pile on weight and then wonder why my shoulders ached and progress stalled. Relearning to brace, to set the scapulae consistently, and to use leg drive transformed not just my numbers, but how my body felt between sessions.
One practical change that helped was filming heavy sets from the side and then coaching myself like a client. I noticed a subtle elbow flare and a collapsing wrist on the heaviest reps. Addressing these with focused warm-up sets and repeated cueing added 10–15 pounds to my working sets within a few weeks without increasing soreness.
In a different season, focusing on paused bench press and heavy close-grip work fixed a stubborn lockout problem. The extra triceps stimulus and mid-range strength translated to smoother, more confident heavy singles in competition. Small, targeted interventions like these are how consistent progress accumulates.
Psychology and the lift

Confidence influences technique and performance. A nervous lifter often tightens in the wrong places or rushes the setup. Develop a short, repeatable pre-lift routine—a breathing cue, a single mental image, and a physical check of your setup—to calm nerves and prime your motor patterns.
Visualization helps: run the rep in your mind with clear sensory details—feet pressure, chest tightness, bar position. Mental rehearsal doesn’t replace physical practice, but it sharpens focus and reduces wasted energy when you step under the bar.
How often to practice the bench
Frequency depends on your level and goals. Beginners often benefit from 2–3 bench sessions per week, focusing on technique and steady loading. Intermediate lifters might handle 2–4 sessions with varied intensities—heavy, speed, and volume days—while advanced lifters structure specialized blocks with careful recovery management.
The key is purposeful practice: every session should have a clear goal, whether it’s technique, volume accumulation, or maximal intensity. Randomly repeating sets without a plan is time-consuming and less productive.
When to seek coaching or physical therapy
If progress feels stalled despite consistent effort and intelligent programming, a qualified coach can provide an outside perspective and technical corrections that are hard to self-diagnose. Video review, cues tailored to your anatomy, and programming adjustments often produce substantial improvements.
See a physical therapist if you experience sharp, persistent pain, especially pain that changes with specific movements or lasts beyond a few days. Timely intervention prevents minor issues from becoming chronic limitations.
Progress checks and how to test safely
Test your strength with intention and adequate tapering. Don’t chase a max after a hard block without a planned taper and a couple of lighter, sharp sessions beforehand. Test days should include a full warm-up progression, technique-specific rehearsals, and a mental plan for attempts.
Use technical indicators—bar speed, touch consistency, and elbow tracking—alongside raw numbers. Bar speed often signals readiness better than a single rep; if your heavier sets move with intent and control, a new max is more likely to follow safely.
Bringing it all together
Mastering the bench press is a mix of consistent setup, intelligent programming, and honest troubleshooting. Focus on repeatable positions, controlled bar paths, and accessory work that closes gaps. Progress rarely comes from grand gestures; it grows from the accumulation of many good reps over time.
Keep your eyes on both technical detail and recovery. Practice the same setup, test small changes, and be patient with incremental gains. With disciplined attention to mechanics and sensible training structure, you’ll press heavier, feel better, and keep showing up for the long term.