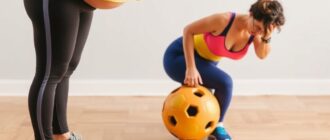
Flat feet can feel like an invisible friction in everyday life—tiring, irritating, and sometimes painful. This article explores practical, evidence-informed training approaches that reduce discomfort, improve function, and support long-term foot health. I’ll share clear exercise progressions, footwear and orthotic guidance, and realistic routines you can use whether you’re an athlete, office worker, or senior.
What flat feet are and why they matter
Flat feet, or pes planus, occur when the medial longitudinal arch of the foot is lower than typical or collapses under load. Some people are born with a low arch while others develop it over time because of injury, muscle weakness, or changes in connective tissue. The presence of a low arch doesn’t always cause problems, but when it alters how you walk or run, it can lead to pain in the feet, ankles, knees, hips, or lower back.
Understanding how a low arch changes movement is important for choosing effective exercises. When the arch collapses, the foot tends to pronate—rotate inward—more than optimal during stance. That change can increase stress on soft tissues and joints and often signals a need to strengthen both local foot muscles and the supporting chain up the leg and hip.
Types and causes
There are flexible flat feet, where the arch appears when the foot is unloaded but flattens while standing, and rigid flat feet, where the arch is reduced regardless of load. Flexible flat feet are more common and generally respond better to conservative treatments. Rigid flat feet sometimes indicate structural issues or past trauma and may require imaging and specialist evaluation.
Common contributing factors include genetic traits, ligamentous laxity, posterior tibial tendon dysfunction, obesity, and repetitive overload. Lifestyle factors—long hours standing, non-supportive footwear, or sudden increases in activity—can all tip the balance from painless low arches to symptomatic flat feet. Addressing both mechanical and behavioral contributors gives the best chance of improvement.
How flat feet change biomechanics
When the arch is reduced, the foot spends more time in pronation during the gait cycle. This changes the alignment above the ankle: the tibia and femur may rotate inward, altering knee tracking and increasing stress on the medial structures. Over time these altered loading patterns can contribute to shin pain, knee pain, or Achilles issues.
Because the foot is the foundation of standing and walking, small changes at the arch can create large downstream effects. That’s why effective training focuses not just on the arch itself but also on the muscles that control the ankle, the calf complex, and the hip stabilizers.
Training principles for people with flat feet
Effective training is guided by three clear principles: reinforce intrinsic foot strength, restore supportive muscle balance across the ankle and calf, and integrate the foot into whole-body movement. Exercises should progress from isolated isometric or low-load work to dynamic, functional patterns that replicate walking, running, and jumping.
Consistency matters more than intensity in the early stages. Short, daily sessions that build motor control and endurance are preferable to occasional intense workouts. The goal is to create reliable control of the arch under load so the foot becomes an active, responsive structure rather than a passive, collapsing base.
Load management and progression
Start with low-load exercises to train motor control and reduce pain. Once technique is reliable and symptoms are stable, progress by increasing repetitions, adding resistance, or introducing dynamic tasks like single-leg balance and step-downs. Avoid sudden leaps in volume or intensity—gradual increases of about 10 percent per week are a practical guide for most people.
Pay attention to symptom response. Mild soreness or fatigue is a normal training signal, but sharp or worsening pain, swelling, or changes in walking pattern indicate you need to reduce load and consult a professional. Track exercises and symptoms in a simple log to help guide measured progression.
Assessment: quick self-checks and when to consult a specialist
You can start with simple self-assessments that give useful information. The wet footprint test and observation of arch behavior in seated, standing, and single-leg positions reveal whether your arch is flexible or rigid. Single-leg heel-rise ability is a practical test of posterior tibial tendon and calf function.
Seek a clinician’s evaluation if you have persistent pain, loss of function, noticeable gait changes, or a history of trauma. A physical therapist or podiatrist can perform targeted tests, measure joint range, assess muscle strength, and recommend orthotics or further imaging if structural concerns arise. Early professional input is particularly important for children with painful flat feet and adults with rapidly progressive symptoms.
Core exercises for the intrinsic foot muscles
Intrinsic foot muscles support the arch from within the foot and are essential for dynamic arch control. Strengthening them improves stiffness and responsiveness during gait. Begin with controlled, short-duration activations and slowly increase load through standing variations.
Three foundational exercises are toe spreading, short-foot contraction, and towel curls. Each targets slightly different intrinsic fibers and movement patterns while remaining safe and simple to do at home. Perform them daily in small sets and then progress to standing versions as control improves.
Toe spreading and grabbing
Toe spreading trains the abductor and intrinsic muscles to resist collapse and improve balance. Sit or stand and try to spread your toes apart, hold for three to five seconds, then relax. Practice three sets of 10–15 repetitions, twice daily, progressing to standing spreads with eyes closed for added challenge.
Towel grabs strengthen toe flexors and arch muscles. Place a towel on the floor and use your toes to scrunch it toward you, then release. Aim for three sets of 10 scrunches, gradually performing the exercise while seated, then standing, and finally on a single leg if stable.
Short-foot exercise
The short-foot contraction teaches the arch to lift without curling the toes. While seated, attempt to draw the base of the toes toward the heel, shortening the foot without flexing the toes. Hold for five to ten seconds and repeat for 8–12 reps, building up to multiple sets throughout the day.
When the technique is reliable seated, try the short-foot while standing and during weight shifts. The standing version becomes a powerful way to retrain the foot to support body weight and reduces reliance on passive ligaments for arch support.
Calf, tibialis posterior, and ankle stabilizer exercises
The calf complex and posterior tibialis are principal support muscles for the arch and rearfoot. Strengthening these muscles reduces excessive pronation and improves push-off during gait. Training should include both concentric and eccentric work to build resilience and tendon capacity.
Two of the most important exercises are heel raises and resisted inversion movements. Heel raises build calf strength and control of the rearfoot, while resisted inversion targets the tibialis posterior more directly. Progressions include single-leg work and slow, controlled eccentrics to load the tendon safely.
Heel raises and single-leg progressions
Start with double-leg heel raises, focusing on full range and controlled descent. Perform 3 sets of 12–15 slow repetitions, with a two-second rise and three-second lower. When the double-leg version becomes easy and pain-free, progress to single-leg heel raises for higher load and specificity.
To challenge control further, do eccentric-only lowering from a step: rise using both feet, then slowly lower on one foot for 3–5 seconds. Repeat 6–8 times per side and gradually increase repetitions as tendon tolerance improves. Eccentric work must be introduced cautiously if you have active tendinopathy—consult a clinician in that case.
Resisted inversion and band work
Resisted inversion strengthens the tibialis posterior, which supports the arch medially. Anchor a resistance band to a stable object and loop the other end around the forefoot, then invert the foot slowly against the band. Perform 3 sets of 10–15 controlled repetitions, focusing on a smooth, non-compensatory motion.
Combine inversion with heel raise progressions for a compound challenge: invert slightly, then perform a heel raise and controlled lowering. This sequence more closely mimics the dynamic action of supporting the arch during push-off and loading phases of gait.
Hip and glute training: why it matters for foot mechanics
Hip strength, particularly gluteus medius and external rotators, stabilizes the pelvis and controls femoral internal rotation. Poor hip control can increase medial knee collapse, increasing pronation demands on the foot. Integrating hip work reduces compensatory stress and creates a more balanced kinetic chain.
Key exercises include side-lying clamshells, unilateral bridges, and lateral band walks. These movements train the lateral hip and external rotators in functional patterns and are easily combined with foot-focused work for efficient sessions.
Practical hip exercises
Start with the clamshell: lie on your side with knees bent and lift the top knee while keeping the feet together. Do 2–3 sets of 12–20 reps per side, focusing on a slow, controlled tempo. If clamshells become easy, advance to standing band walks and single-leg Romanian deadlifts for more integration.
Lateral band walks target the gluteus medius in a weight-bearing position that translates to walking and running. Place a resistance band around the ankles or just above the knees and take controlled side steps for 10–20 steps each direction. Repeat for 3 sets, keeping a slight squat and avoiding torso lean.
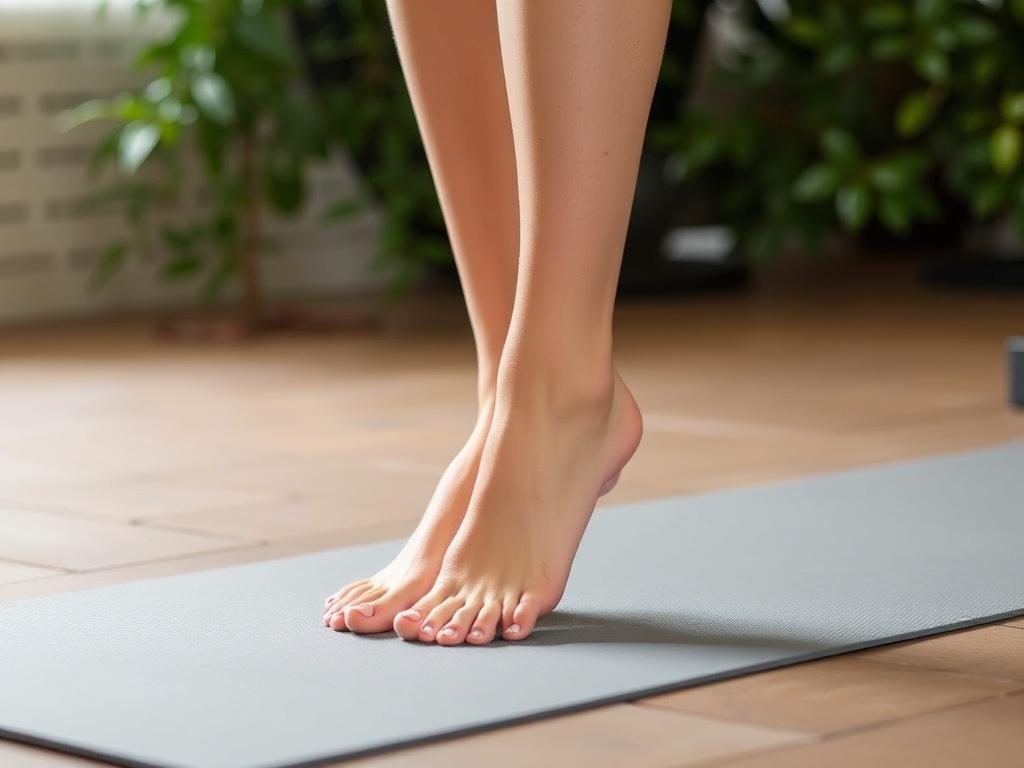
Balance and proprioception training
Good proprioception helps the nervous system react to uneven surfaces and prevent the arch from collapsing. Balance training improves foot and ankle awareness and reduces injury risk. Exercises range from simple single-leg stands to dynamic tasks on unstable surfaces.
Begin with barefoot single-leg stands on stable ground and then progress to eyes-closed variations, tandem stance, or foam pads. Incorporate small perturbations and reach tasks to simulate real-world balance demands and reinforce neuromuscular control.
Progressions for balance work
A basic progression is: double-leg balance, single-leg balance, single-leg balance with eyes closed, single-leg balance on an unstable surface, and single-leg balance with added movement like reaching or passing a ball. Spend 30–60 seconds per attempt and repeat for 3–5 sets depending on fatigue.
For athletes, integrate sport-specific tasks such as single-leg hops and change-of-direction drills once baseline control is established. These dynamic drills should only be introduced after strength and pain-control milestones are met to avoid exacerbating symptoms.
Mobility and stretching for calf, plantar fascia, and Achilles
Tightness in the calf muscles and plantar fascia can worsen the functional collapse of the arch. Mobility work aims to restore ankle dorsiflexion and reduce compensatory pronation. Gentle, consistent stretching paired with massage or self-myofascial techniques supports recovery and performance.
Effective methods include a straight-knee calf stretch, knee-bent calf stretch for soleus, and toe dorsiflexion techniques for the plantar fascia. Hold stretches for 30–45 seconds, repeat 2–3 times, and perform them after activity or as a separate mobility session.
Targeted stretches and soft tissue techniques
For the gastrocnemius, stand facing a wall with the back leg straight and heel down, lean forward to feel the stretch behind the calf. For the soleus, repeat with the back knee slightly bent to isolate the deeper muscle. These subtle variations ensure the entire calf complex is addressed.
Plantar fascia mobility can be improved with toe pulls and rolling the arch over a ball. Use a lacrosse or tennis ball and apply moderate pressure under the arch, rolling for one to two minutes. Avoid aggressive pressure if it provokes sharp pain—gentle work yields better long-term results.
Sample training programs
Below are practical program templates tailored to different needs: a brief daily routine for busy adults, a progressive six-week program for strengthening, and an athlete-focused regimen. You can mix and match modules depending on goals and symptom response. Always adapt volume to personal tolerance and medical advice.
Daily maintenance routine (10–15 minutes)
1) Short-foot contractions: 3 sets of 10 holds (5–10 seconds). 2) Toe spreads: 3 sets of 12 reps. 3) Towel scrunches: 3 sets of 10. 4) Double-leg heel raises: 3 sets of 15 slow reps. 5) Single-leg balance: 3 x 30–45 seconds per side. Perform this sequence most days, adjusting frequency if symptoms flare.
This short routine builds neural control and endurance without requiring large time commitments. It’s ideal for people with mild symptoms or those who want to prevent deterioration while remaining active.
Six-week progressive strengthening program
Weeks 1–2: Focus on technique and low-load endurance—short-foot holds, toe spreads, towel scrunches, double-leg heel raises, and clamshells. Perform these exercises five days a week with low volume and perfect form. Weeks 3–4: Increase load—add single-leg heel raises, resisted inversion, and lateral band walks; reduce frequency to four days a week but increase sets and resistance.
Weeks 5–6: Introduce dynamic and functional activities—single-leg hops, step-downs, eccentric calf lowers, and sport-specific drills if applicable. Train three to four times a week and monitor response. If pain increases, return to the previous week’s load and consult a clinician before advancing again.
Athlete-focused plan (strength and resilience)
Include two targeted foot sessions per week combined with full-body strength and plyometric training. Session content: short-foot and toe work warm-up, single-leg heel raises with added load, eccentric calf lowering, lateral band walks, and single-leg hops or bounding for power. Add hip and core strength work to support the chain and incorporate mobility and recovery techniques post-session.
Progress by adding resistance, increasing vertical or horizontal load in plyometrics, and varying surface challenges. Athletes should coordinate with coaches and therapists to balance sport practice and minimize overload.
Exercises table: targets, sets, and tips
The table below summarizes common exercises, the primary muscles or structures they target, recommended sets and reps, and practical tips. Use it as a quick reference when building a routine.
| Exercise | Primary target | Sets & reps | Practical tip |
|---|---|---|---|
| Short-foot contraction | Intrinsic foot muscles | 3 x 8–12 holds (5–10s) | Keep toes relaxed; shorten the foot without curling. |
| Toe spreads | Toe abductors, intrinsics | 3 x 12–15 | Progress to standing and eyes-closed variations. |
| Towel scrunches | Toe flexors, intrinsics | 3 x 10 | Use a larger towel or add weight for more challenge. |
| Double/single-leg heel raises | Gastrocnemius, soleus | 3 x 12–15 (double) / 3 x 8–12 (single) | Slow eccentric descent; full range of motion. |
| Resisted inversion | Tibialis posterior | 3 x 10–15 | Control the return; avoid compensatory hip movement. |
| Lateral band walks | Gluteus medius | 3 x 10–20 steps each way | Maintain slight squat and upright torso. |
| Single-leg balance | Proprioception, whole-leg control | 3–5 x 30–60s | Progress to unstable surfaces or added perturbations. |
Footwear, orthotics, and practical aids
Shoes matter. Supportive footwear with a stable heel counter, moderate arch support, and a firm midsole can reduce symptoms while training builds capacity. Minimalist shoes may be useful later in progression for people who have developed adequate strength and control, but they can be problematic if used prematurely.
Custom or over-the-counter orthotics are tools, not cures. They can provide immediate relief by supporting the arch, redistributing pressure, and improving alignment. Use orthotics as an adjunct to training—overreliance without strengthening risks dependence and limited long-term improvement.
Choosing shoes and orthotics
For daily wear, choose shoes with a firm heel, good midfoot support, and a roomy toe box. Avoid overly flexible or heavily cushioned shoes that allow excessive pronation. When buying running shoes, consult a knowledgeable fitter who considers gait pattern and training load rather than marketing claims alone.
If you try orthotics, start with a conservative insole and monitor your body’s response. A physical therapist or podiatrist can prescribe custom devices for severe or persistent cases. Regular reassessment is important—foot shape and needs can change as you strengthen and modify activity.
Common mistakes and how to avoid them
A frequent error is focusing only on passive supports like orthotics or shoes without training the muscles that control the arch. Another mistake is rushing progression—introducing high-impact activities before the foot and tendon capacity are ready. Both errors can prolong symptoms and lead to setbacks.
Avoid chasing a perfect arch appearance. The goal is functional control and pain-free activity, not a cosmetically high arch. Patience, consistent practice, and measured progression yield the best outcomes for most people.
When training isn’t enough: red flags and next steps

Training and conservative measures help most people, but there are clear signs that you should seek medical evaluation. Sudden increases in pain, progressive deformity, inability to perform a heel rise, or neurologic symptoms like numbness warrant prompt clinical attention. For children with pain or rapidly worsening alignment, early assessment is important to rule out developmental conditions.
A specialist may recommend imaging, bracing, or surgical consultation depending on the cause and severity. Surgery is a last resort reserved for structural problems or cases that fail exhaustive conservative management. Most people improve significantly with targeted, progressive rehabilitation.
Monitoring progress and staying motivated

Keep a simple training log that records exercises, sets, pain levels, and subjective ease of daily activities. Objective markers like improved single-leg heel rise count, reduced pain on prolonged standing, or increased walking distance are useful milestones. Small, measurable wins help maintain motivation and guide sensible progression.
Remember that improvement is often gradual. Some gains occur in weeks, while structural adaptations and improved tendon tolerance may take months. Celebrate functional improvements—less fatigue, fewer flare-ups, better balance—rather than chasing perfect biomechanics overnight.
Personal experience: a pragmatic perspective
I’ve worked with colleagues and friends who struggled with flat feet—some with long careers on their feet, others with childhood low arches that only became painful in adulthood. What consistently helped was a shift from passive fixes to simple daily practices: a short set of intrinsic foot exercises, dependable heel raises, and attention to shoes. Over months they reported less tiredness and fewer aches after long days.
One friend, an amateur runner, improved running comfort by adding a weekly eccentric calf routine, consistent short-foot practice, and swapping a worn-out shoe model for a firmer, more stable trainer. The change wasn’t instant, but gradual progress allowed a return to regular training without recurring pain.
Putting it into practice: a week-by-week starter plan

Week 1: Daily short-foot practice, toe spreads, towel scrunches, and seated resisted inversion. Aim for short sessions (10–15 minutes) with attention to quality. Week 2: Add double-leg heel raises, calf stretches, and single-leg balance attempts; continue daily or five times per week depending on fatigue.
Week 3–4: Begin single-leg heel raises, lateral band walks, and side-lying clamshells two to three times per week. Incorporate foam rolling and plantar mobility after sessions. Week 5–6: Introduce dynamic tasks—controlled step-downs, single-leg hops for athletes, and more demanding balance challenges. If symptoms increase at any stage, reduce volume and reassess technique.
Final practical tips
1) Start small and be consistent—short daily practice beats sporadic long sessions. 2) Focus on technique and controlled movement rather than repetitions for the sake of numbers. 3) Pair foot-focused training with hip and core work to address the entire functional chain. 4) Use footwear and orthotics as tools, not substitutes for exercise. 5) Seek professional help when pain is severe, progressive, or accompanied by functional loss.
Training with flat feet is not about curing a structural label overnight; it’s about building a foot that reliably supports the activities you care about. With patience, sensible progression, and practical tools, most people can reduce symptoms, improve performance, and reclaim daily comfort.