
There’s a graceful, slightly rebellious charm to a simple inflatable ball that most gym machines will never match.
In this article I’ll walk you through practical, safe, and effective exercises that use that humble piece of equipment to build strength, stability, and mobility from head to toe.
Why a stability ball is so effective for full-body training
A stability ball challenges your body in three dimensions, forcing muscles to work together rather than in isolation.
That instability recruits small stabilizers around joints, improves proprioception, and enhances functional strength useful for everyday movements.
Because the ball is forgiving and adaptable, you can scale intensity simply by changing position or adding time under tension, which makes it an ideal tool for both beginners and advanced trainees.
Key benefits to expect
Balance and core control usually improve faster when you train on an unstable surface, because you’re constantly correcting and stabilizing.
Functional strength increases too, since many ball exercises require coordination across multiple muscle groups rather than one isolated lift.
Finally, mobility and flexibility often get a boost—rolling, stretching, and dynamic movements on the ball open up the spine and hips in ways static machines rarely mimic.
Safety first: setup, ball size, and posture
Choosing the right ball size is the simplest safety step that slips past many people; sitting posture and joint alignment depend on it.
Inflate the ball so it feels firm but has some give—when seated, your knees should form roughly a 90-degree angle with feet flat on the floor.
Always warm up before doing more demanding stability-ball drills, and make sure you have clear floor space without sharp objects nearby.
Ball size guide
Use the following general rule: people under 5’5″ typically use a 55 cm ball; 5’6″ to 6’0″ use 65 cm; taller than 6’0″ often prefer 75 cm.
These sizes are not a strict law, but they keep your hips and knees in sensible alignment for most exercises.
If you’re between sizes, lean toward the smaller ball for more control; lean toward the larger ball for greater challenge to posture and range of motion.
| Height | Recommended ball diameter |
|---|---|
| Under 5’5″ | 55 cm |
| 5’6″–6’0″ | 65 cm |
| Over 6’0″ | 75 cm |
How to warm up using the ball
A short mobility routine on the ball prepares the nervous system and lubricates the joints for more intense work.
Start with gentle spinal rolls while seated on the ball, then progress to cat–cow motions with hands on hips or the ball for additional spine mobility.
Finish the warm-up with dynamic leg swings and controlled lunges to prime the hips and hamstrings before loading them.
Quick warm-up sequence (5–8 minutes)
Sit tall on the ball and breathe for 30–60 seconds, allowing your pelvis to settle and your feet to find balance.
Perform 8–12 slow spinal circles, then 8–12 cat–cow reps with the ball supporting your lower back for range and control.
Finish with 8–10 standing hip circles per side or gentle walking lunges, keeping movements controlled and breathing steady.
Core and balance exercises that build a solid foundation
Core work on the ball is less about endless crunches and more about integrated stability under load and movement.
The following exercises emphasize anti-extension, anti-rotation, and balance—three core attributes that transfer to everyday activity and athletic pursuits.
Perform these movements slowly at first, focusing on form and breathing, then increase tempo or reps as your control improves.
Ball plank
Place your forearms on the ball and walk your toes back until your body forms a straight line from head to heels.
Hold for 20–60 seconds, keeping your ribs down and hips level; the instability of the ball forces deeper recruitment of the transverse abdominis and obliques.
To progress, lift one leg for alternating single-leg planks or move to straight-arm planks with hands on the ball for added shoulder demand.
Roll-outs
From a kneeling position, place your forearms or hands on the ball and slowly roll the ball forward, extending your spine while maintaining a neutral lumbar position.
Pause when you feel the abdominals engage, then roll the ball back under controlled tension.
This exercise trains anti-extension strength similar to an ab wheel but with a slightly different balance challenge; keep progressions slow to avoid lower-back strain.
Crunches on the ball
Lie with your lower back supported by the ball, feet flat and knees bent; perform small, quality crunches lifting from the ribs rather than yanking from the neck.
The ball increases range of motion at the lower thoracic spine, which engages more muscle fibers throughout the rectus abdominis.
Limit reps to quality sets of 10–20 and pair them with anti-extension drills to maintain balanced core development.
Russian twists with ball
Sit on the floor, lean back slightly with knees bent, and hold the ball at chest height; rotate the torso slowly from side to side.
Keep the movement controlled and the spine long, moving only through the mid-back and obliques rather than reaching with the arms.
This exercise improves rotational control and functional anti-rotation strength, which matters for sports and many daily tasks.
Upper‑body strength: pressing and pulling variations
The stability ball can be a versatile bench substitute, adding an element of balance to typical pressing and rowing movements.
Using the ball increases core demand during chest presses and challenges shoulder stabilizers when performing push-ups or rows.
Start with light weights and stable variations, then progress to more dynamic or unilateral movements once technique is solid.
Chest press on the ball
Lie with your upper back on the ball, hips lifted so your body forms a straight line, and press dumbbells from chest to overhead.
This setup forces your glutes and hamstrings to work isometrically to maintain hip position while your core stabilizes the spine.
Use a weight that lets you complete controlled sets of 8–15 reps without losing balance.
Push-ups with hands on the ball
Place your hands on the ball and perform push-ups; the unstable surface increases shoulder and core recruitment substantially.
Begin with knees on the ground if full-body push-ups feel too unstable, then progress to toes as your balance improves.
To make the exercise harder, elevate your feet or try a single-arm push-up with the other hand on a stable surface.
Single-arm row using ball
Place one knee on the ball and the opposite hand on the floor for support, or lie with your chest on the ball for prone rows with dumbbells.
Pull the dumbbell toward the hip in a controlled arc, emphasizing scapular retraction and avoiding trunk rotation.
Unilateral rows are excellent for correcting imbalances and training anti-rotational stability under load.
Lower body and posterior chain exercises
The ball is particularly effective for targeting the glutes and hamstrings through controlled bridging and rolling movements.
Because those posterior muscles stabilize the pelvis and spine, training them on the ball often improves posture and reduces low-back complaints.
Mix isolated ball drills with compound movements to create balanced lower-body development.
Hamstring curl
Lie on your back with heels on the ball and hips lifted into a bridge; roll the ball toward your glutes by bending the knees, then roll it out again.
Keep the hips elevated throughout the set to emphasize the hamstrings and glutes and to avoid letting the lower back sag.
Perform slow, controlled reps for 8–15 repetitions; adding a pause at the peak increases intensity without extra weight.
Glute bridge on the ball
Similar to a standard bridge but with feet on the ball, this variation increases instability and forces deeper glute recruitment.
Drive through the heels, squeeze the glutes at the top, and lower with control; avoid hyperextending the lumbar spine at the finish.
Add single-leg variations to further challenge balance and unilateral strength once the double-leg version feels secure.
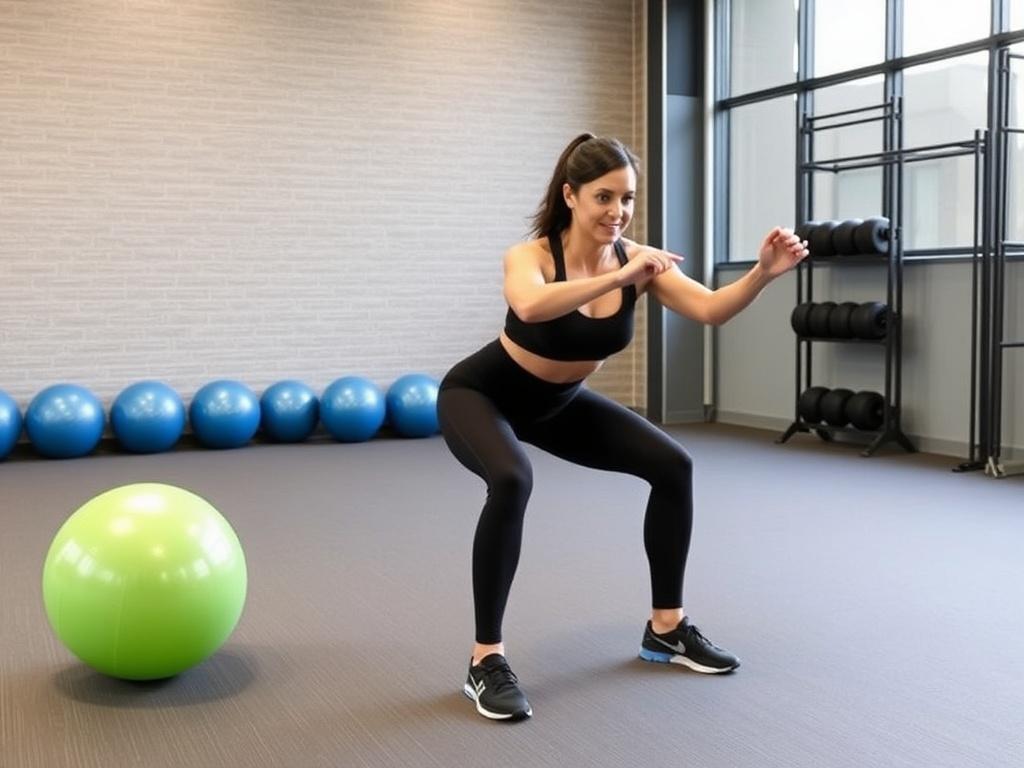
Wall squats with ball
Place the ball between your lower back and a wall, then squat down and stand up, letting the ball roll along the spine to guide movement.
This is a joint-friendly way to learn proper squat mechanics and build quad and glute strength without heavy spinal loading.
Control depth to your mobility, aiming for thighs to reach parallel or slightly below if your knees and hips allow it.
Split-squat with ball support
Use the ball as a balance aid behind you on a bench or wall and perform split squats with the rear foot supported, focusing on the front leg drive.
The ball reduces stress on the back knee while still challenging the lower limb strength and stability of the front leg.
Keep torso upright and stop the descent when the front thigh is parallel to the ground or sooner if you feel discomfort.
Full-body compound movements
Compound moves that involve multiple joints are where the ball truly shines as a functional training tool.
These exercises blend strength, stability, mobility, and coordination, offering a higher training return per minute than isolated lifts.
Use them in circuits to raise heart rate and train strength endurance effectively.
Ball roll-to-stand
Start kneeling with the ball in front, place your hands on it, roll forward to a plank-like position, then pull the ball toward you and stand up by stepping forward.
This movement links core anti-extension with lower-body strength and balance, providing a full-body challenge in one sequence.
It’s a demanding drill; begin slowly and accept partial progressions like rolling to knees before attempting the full stand.
Stir-the-pot
Assume a forearm plank with forearms on the ball and make slow circular “stirring” motions with your elbows, first clockwise then counterclockwise.
The exercise elevates core demand and shoulder stabilization while improving endurance in deep abdominals and obliques.
Keep circles controlled—large, slow motions are more effective and safer than hurried, tiny adjustments.
Designing full-body workouts with the ball
A full-body routine with a stability ball should balance push/pull, upper/lower, and anti-flexion/anti-rotation elements within each session.
Circuits work well: alternate strength movements with short cardio or mobility bursts to keep intensity and demand high.
Below are three sample workouts—beginner, intermediate, and advanced—each structured to be efficient and balanced.
Sample circuit formats
Beginner: pick 6 exercises, perform 10–12 reps each, rest 60–90 seconds between rounds, complete 2–3 rounds.
Intermediate: choose 8 exercises, perform 8–12 reps or 30–45 seconds per station, rest 30–60 seconds, complete 3–4 rounds.
Advanced: include unilateral and dynamic moves, perform 6–10 reps with 15–30 seconds rest, aim for 4–6 rounds or EMOM-style work.
| Level | Exercises per round | Rounds | Rest |
|---|---|---|---|
| Beginner | 6 | 2–3 | 60–90 sec |
| Intermediate | 8 | 3–4 | 30–60 sec |
| Advanced | 6–10 | 4–6 | 15–30 sec |
Beginner full-body circuit (example)
Perform each exercise for 10–12 reps: wall squats with ball, chest press on ball with light dumbbells, hamstring curl, seated ball marches, ball-supported single-arm row, and seated overhead press.
Rest 60 seconds after finishing a round, and repeat for 2–3 rounds depending on fatigue and form quality.
This circuit builds confidence on the ball while training balance, strength, and coordination in manageable chunks.
Intermediate circuit (example)
Perform each movement for 8–12 reps or 30–40 seconds: push-ups on ball, single-leg bridge, roll-outs, standing Russian twists with ball, ball wall squats, and prone dumbbell rows on the ball.
Keep rest short to maintain cardiovascular demand and complete 3–4 rounds for a workout that feels both strength- and conditioning-oriented.
Increase difficulty by adding tempo changes, pauses at the hardest point, or light weights as appropriate.
Advanced circuit (example)
Include stir-the-pot (30 sec), single-leg hamstring curl with pause (8–10 reps), explosive wall ball step-ups (8–10 per leg), single-arm chest press with leg lift (8–10 per side), and rolling-to-stand progressions.
Use shorter rests (15–30 seconds) and perform 4–6 rounds for a high-intensity, coordination-heavy session.
Advanced circuits demand precise technique; use them sparingly and prioritize recovery between sessions.
Progression strategies and how to measure improvement

Progress by increasing reps, sets, range of motion, unilateral challenge, or by reducing stability—each change increases neuromuscular demand differently.
Track performance with short logs: record reps, hold times, and perceived exertion so you can reliably increase volume or intensity week to week.
Progression doesn’t always mean heavier weights; shifting from bilateral to unilateral work or from supported to unsupported positions can produce substantial gains.
Reasonable progression timeline
Beginner trainees often notice balance and core improvements in 2–4 weeks; strength gains usually appear in 4–8 weeks with consistent work.
Intermediate and advanced trainees should aim for incremental challenges every 2–3 weeks, balancing overload with recovery to avoid plateaus.
Regular reassessment—retesting a set of standardized drills every 4–8 weeks—keeps training honest and purposeful.
Common mistakes and how to avoid them

A few predictable errors can reduce benefit or increase injury risk, but they’re easy to fix with attention to detail.
Typical problems include excessive spinal extension during roll-outs, using momentum instead of control during presses, and choosing a ball that’s the wrong size.
Correct these issues by slowing the tempo, reducing range of motion until you have control, and asking a training partner or coach to watch form.
Specific form cues to remember
During core drills, think “braced belly”—draw the ribs down and imagine zipping the lower abdomen toward the spine to maintain neutral alignment.
For pressing and rowing, initiate movement from the scapula—retract and depress before pulling or pressing—to protect the shoulder joint.
When squatting or lunging with the ball, prioritize knee tracking over the toes and keep the chest lifted to avoid collapsing forward.
Mobility and recovery using the ball
The ball is as helpful for unwinding tight muscles as it is for loading them; use it for myofascial release and gentle spinal mobilizations.
Rolling your upper back on the ball improves thoracic mobility; placing the ball under the hips and doing gentle pelvic tilts can relieve low-back tension.
Include 5–10 minutes of ball-based mobility at the end of intense sessions to accelerate recovery and maintain range of motion.
Stretching sequence with the ball
Start with thoracic extensions—lie on the ball at mid-back, arms out wide, and breathe into the upper ribs for 30–60 seconds per position.
Proceed to hip-flexor stretches with the ball under one hip and the other knee bent, leaning forward slightly to deepen the stretch without pinching the lumbar spine.
Finish with hamstring releases: sit with the calf draped over the ball and reach for the toes, or place heels on the ball and hinge forward gently.
Equipment and space considerations
A good-quality burst-resistant ball is a worthwhile investment; cheap models can deflate or pop unexpectedly.
Wear non-slip shoes or train barefoot for better foot grounding, and choose a clear, flat area with at least two meters of space around you to allow safe rolling.
Accessories like a small mat prevent slipping, and a pump helps maintain consistent inflation for predictable performance.
Programming frequency and recovery
Training on the ball two to four times per week fits most goals: twice for maintenance or mobility focus, three to four times for strength and conditioning.
Because many ball exercises are lower-load but higher-demand on stabilizers, allow at least 48 hours between high-intensity sessions targeting the same movement patterns.
Complement ball sessions with heavier, stable lifts if your goal is maximal strength, and with cardio or mobility work if your goal is general fitness.
Adapting workouts to different goals
If your aim is fat loss, structure ball circuits to keep heart rate elevated with short rests and compound movements; pair that with nutrition and strength training off the ball.
Rehabilitation goals benefit from controlled, low-range-of-motion exercises that restore control and reduce pain without heavy loading.
For athletes, integrate ball work as accessory training to improve balance, unilateral control, and core resilience that supports sport-specific mechanics.
How to combine a stability ball with other equipment
Adding dumbbells, resistance bands, or kettlebells expands the ball’s utility and enables progressive overload while maintaining instability.
For example, perform dumbbell chest presses on the ball to add load, or use a band anchored behind you during ball-supported rows for accommodating resistance.
Remember that adding external load multiplies the need for control—scale weights conservatively until you’re confident the ball won’t compromise safety.
Real-life examples and training tips from my experience
I began using a stability ball years ago to iron out low-back niggles; simple hamstring curls and bridge progressions reduced my soreness in weeks.
One practical tip I learned the hard way: always check the ball’s inflation before a session. A slightly softer ball completely changes balance and makes even familiar moves feel unstable.
Another insight: pairing short ball-based circuits at the end of a gym session keeps training varied and prevents boredom without adding significant fatigue.
Adapting exercises for older adults and beginners

Older adults often benefit from ball work to improve balance and reduce fall risk; choose seated and supported variations initially and emphasize slow control.
Begin with chair-assisted ball squats, seated marches on the ball, and standing presses with the ball against a wall to reduce instability while still training co-contraction.
Encourage short, frequent practice rather than long sessions, and focus on consistent progress in balance and confidence before increasing complexity.
Tracking progress and staying motivated
Use simple benchmarks like hold times for planks, reps for hamstring curls, or single-leg balance durations to track improvements over weeks and months.
Take periodic photos or short videos to objectively evaluate posture and form—small technique improvements often precede stronger performance.
Vary workouts every 4–6 weeks to keep your nervous system challenged and to prevent mental plateau; rotation keeps the routine interesting and effective.
Frequently asked questions
Is a stability ball safer than free weights for beginners? It can be, because it reduces spinal loading while still developing strength and balance, but it requires careful technique to avoid falls.
How often should I replace the ball? Inspect the ball for wear before each season of heavy use; most quality balls last years with proper care but replace if you see cracks or material fatigue.
Can I use the ball if I have back pain? Often yes, with the right exercises and guidance. Start with low-load mobility and anti-extension drills and consult a medical professional for specific conditions.
Quick troubleshooting guide
Problem: Hips sag during roll-outs or planks. Fix: Reduce range of motion and focus on bracing the core; slowly build hold time.
Problem: Ball slips on the floor. Fix: Train on a non-slip surface or use a mat; clean the ball to remove dust or residue that reduces grip.
Problem: Shoulders feel strained during press variations. Fix: Check scapular mechanics—retract and stabilize before pressing, and reduce weight if necessary.
Final practice plan to try this week
Day 1: Core-focused session with planks on the ball, roll-outs, stir-the-pot, and seated Russian twists for 20–30 minutes total.
Day 3: Full-body circuit including chest press on ball, hamstring curls, wall squats with ball, and single-arm rows for 30–40 minutes.
Day 5: Mobility and recovery work: thoracic extensions on the ball, hip-flexor variations, and gentle bridging for 15–20 minutes.
Incorporating a stability ball into your training is less about novelty and more about purposeful challenge—finding the right balance between instability and control amplifies the work your body must do.
Used thoughtfully, the ball can upgrade a home routine, rehabilitate nagging stiffness, or add a finishing circuit to a heavy lifting day.
Pick the right size, progress steadily, and enjoy the unusual mix of playfulness and practicality that a simple ball brings to full-body training.