
The lunge is one of those simple exercises that quietly delivers big results: stronger legs, improved balance, and better single-leg control for sports and daily life. If you’ve searched for Как правильно делать выпады or wondered what the right cues are, this article walks you through every detail with clear steps, practical fixes, and real-world coaching tips.
Why lunges deserve a prominent place in your workouts
Lunges train each leg independently, which helps eliminate imbalances that squats can mask. That unilateral work translates into more stable ankles, stronger glutes, and better single-leg power for running, jumping, and stepping up onto surfaces.
Beyond pure strength, lunges tax balance and coordination. When one leg supports your body through a loaded range of motion, your nervous system learns to control alignment under stress — a skill that pays dividends in sports, functional tasks, and injury prevention.
Finally, lunges are highly adaptable. You can vary direction, load, tempo, and range of motion to prioritize size, strength, or endurance. That flexibility makes them useful whether your goal is aesthetics, athletic performance, or rehabilitation.
Basic biomechanics: what happens during a lunge
A lunge is a single-leg dominant movement where one leg acts as the primary driver while the other provides support and balance. The front leg goes through hip and knee flexion and then extends, which primarily engages the quadriceps and gluteus maximus, with the hamstrings assisting in hip control.
The rear leg contributes isometrically and eccentrically — particularly in forward and reverse lunges — by stabilizing the hip and knee and controlling descent. Core muscles and the contralateral hip abductors also work to maintain upright posture and resist lateral collapse.
Joint angles and foot placement change muscle emphasis. A longer stride increases hip extensor (glute) demand, while a shorter step shifts load toward the quads. Understanding this lets you manipulate the lunge to target specific weaknesses or training goals.
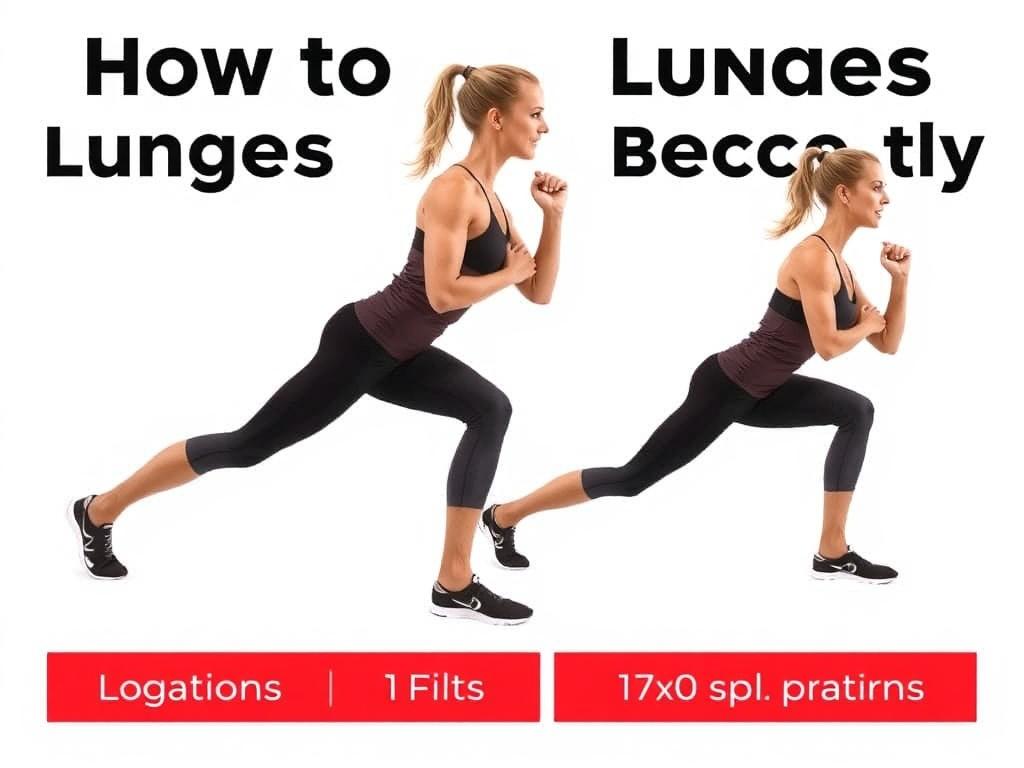
Step-by-step: how to perform a perfect forward lunge
Before you step forward, establish a stable posture: feet hip-width apart, shoulders stacked over hips, and a neutral spine. Visualize moving the entire body forward rather than dropping into the knee; that subtle intention improves balance and reduces knee shear forces.
- Stand tall with feet hip-width apart and hands on your hips or by your sides for balance.
- Take a controlled step forward with one foot — aim for a stride that lets your front knee track roughly over your mid-foot.
- Lower your back knee toward the floor by bending both knees until the front thigh is about parallel to the ground. Keep your torso upright and core engaged.
- Press through the front heel to return to standing, or push off the back foot for a walking lunge variation.
- Repeat the desired repetitions, then switch legs. Maintain rhythm and control throughout the set.
As you perform the steps, keep three main cues in mind: keep the chest proud and not collapsed, drive from the heel of the front foot, and avoid letting the front knee fall inward. Those cues help preserve joint alignment and maximize muscle recruitment.
If you use added weight, such as dumbbells or a barbell, re-check posture: the load should stay centered over the mid-foot through the descent and ascent. If the weight pulls you forward or backward, reduce load and refine technique before progressing.
Common mistakes and how to fix them
One frequent error is letting the front knee travel far past the toes, which can increase unwanted stress and compromise balance. Fix this by stepping back slightly and emphasizing a controlled vertical drop rather than a forward lunge; you’ll find the knee tracks more safely.
Another issue is a rounded chest or forward-leaning torso, often caused by weakness in the core or glutes or by excessive weight. Correct the posture with lighter loads and focused core bracing, and practice pauses at the bottom of the movement to build positional control.
Many people also experience knee valgus — the knee collapsing inward — which signals weak hip abductors and external rotators. Address this with glute medius strengthening (side-lying clams, band walks), and perform lunges with an emphasis on pushing the knee gently out toward the second toe.
Variations and when to use each

Forward lunges are great for building quad strength and teaching stepping mechanics. They mimic many athletic movements such as the stride used in running and are straightforward to progress in load and volume.
Reverse lunges reduce anterior knee stress because the movement encourages a more vertical shin and a more balanced center of gravity. For people with sensitive knees or beginners, reverse lunges are often a better starting point.
Walking lunges add a dynamic component and tax endurance, coordination, and unilateral stability. Bulgarian split squats — a split-stance rear-elevated variation — greatly increase hip extensor demand and are excellent for building single-leg strength and depth of range of motion.
Directional lunges: lateral and curtsy
Lateral or side lunges shift emphasis to the adductors and outer hips, improving capacity for side-to-side movement and injury-preventing stability. Curtsy lunges combine hip adduction and rotation and can be useful for correcting movement asymmetries and working the glute medius under a rotational load.
Use directional lunges when your sport or lifestyle requires multi-planar strength, such as tennis, basketball, or hiking on uneven terrain. Start light, prioritize control, and pay attention to knee path during lateral changes.
Programming lunges: sets, reps, and frequency
Your goal determines how you should program lunges. For hypertrophy, aim for 8–15 reps per leg per set with moderate load and 2–4 sets. For strength, use lower reps — 4–6 per leg — and heavier weights across 3–6 sets, with longer rest between sets.
Endurance and conditioning benefit from higher-rep schemes or walking lunge sequences, such as 3–5 sets of 15–30 steps per leg, performed with lighter loads and shorter rest. Frequency can range from twice a week for beginners to 3–4 times weekly if lunges are a primary training focus.
Progress logically: increase reps or sets first, then add weight, then modify tempo. Rapid increases in load or volume tend to create knee or hip irritation, so track perceived exertion and joint comfort as you progress.
Sample programming table
Below is a compact guide for structuring lunge work across three experience levels; think of it as a starting point rather than a rigid prescription.
| Level | Sets | Reps per leg | Rest | Notes |
|---|---|---|---|---|
| Beginner | 2–3 | 8–12 | 60–90s | Bodyweight or light dumbbells, focus on form |
| Intermediate | 3–4 | 6–12 | 90–120s | Heavier dumbbells or barbell, add tempo work |
| Advanced | 3–6 | 4–8 | 2–3m | Loaded variations, paused or tempo sets for control |
Use the table as a flexible template: if you’re fresh and moving well, choose the higher end of the ranges. If form breaks down, reduce load or volume immediately to protect joints and reinforce technique.
Progressions and adding load safely

Start with bodyweight lunges until you can maintain consistent technique through the full rep range and feel stable at the bottom position. From there, progress by adding light dumbbells, switching to a heavier weight, or increasing range of motion with elevated surfaces.
When loading a lunge with a barbell, ensure your setup and step pattern feel natural. Goblet lunges or holding dumbbells at your sides are simpler progressions that keep the load centered and allow you to focus on alignment before loading the spine.
Tempo and pauses are powerful progression tools. Slow descending tempos (3–5 seconds down) improve eccentric control, while a two-second pause at the bottom builds strength in the deepest part of the movement and reveals stability weaknesses.
Mobility and prehab drills to support lunges
Limited ankle dorsiflexion and tight hip flexors are common obstacles to a deep, stable lunge. Address ankles with weighted ankle dorsiflexion stretches or wall ankle mobilizations, and work hip flexors with kneeling lunge stretches that focus on posterior pelvic tilt.
Thoracic mobility and scapular position also matter because an upright torso depends on a stable upper back. Include thoracic rotations and band pull-aparts in your warm-up to help maintain a proud chest during lunges.
Simple activation drills — glute bridges, banded lateral walks, and single-leg balance holds — prepare the nervous system and prime the muscles you’ll rely on during loaded lunges. A brief warm-up set of bodyweight lunges is an effective final prep before heavy work.
Modifications for knee, hip, and balance issues
If you feel anterior knee pain during forward lunges, switch to reverse lunges or split squats to reduce tibial translation. Reverse lunges tend to keep the knee behind the toe more naturally and are easier on the patellofemoral joint for many people.
For balance problems, practice static split squats or use support such as a TRX strap or light fingertip touch on a stable surface. This allows you to develop single-leg strength without repeatedly losing balance and interfering with load progression.
If hip pain occurs, check for mobility restrictions and reduce range of motion. Pain that persists with careful modification and reduced load should be evaluated by a healthcare professional; lunges can often be reintroduced later as mobility and control improve.
Breathing, tempo, and tension cues

Breathe rhythmically to support bracing: inhale before the descent, hold a gentle brace through the eccentric phase, and exhale as you drive up. This pattern protects the spine and keeps intra-abdominal pressure appropriate under load.
Tempo matters. A controlled descent teaches stability and forces the muscles to handle eccentric load, while explosive ascents develop power. For hypertrophy, consider a 3-1-1 tempo (three seconds down, one-second pause, one-second up). For power, use a controlled descent and an explosive drive up.
Maintain tension through the entire body: brace the core, flex the quads slightly, and imagine gripping the ground with the toes of the front foot. That full-body tension keeps force directed through the hips and knees the way you intend.
How to diagnose form problems with simple checks
Video yourself from two angles: front and side. The side view shows torso lean and hip depth; the front view reveals knee valgus and foot collapse. These visual checks are the fastest way to pinpoint what needs correction.
Use simple tactile feedback: place a band around the knees and feel whether it wants to pull the knees inward as you descend. If it does, focus on pushing the knees gently outward against the band while lunging. This trains the hip abductors in a functional context.
Finally, test single-leg strength with a pistol progression or single-leg box step. If you struggle to control depth relative to that test, reduce lunge depth and strengthen deficits with accessory work before advancing load.
Accessory exercises that improve lunge performance
Glute bridges and hip thrusts increase hip extensor strength and help you drive strongly through the top of the lunge. Single-leg Romanian deadlifts teach hip hinge mechanics and posterior chain balance, which complements lunge work nicely.
Band-resisted lateral walks and clamshells target the glute medius to prevent knee collapse. Bulgarian split squats and step-ups are excellent high-transfer exercises because they emphasize single-leg strength in slightly different planes and loading patterns.
Include core anti-rotation drills, such as Pallof presses, because stability through the torso improves force transfer and reduces compensatory twisting during heavy lunges. Strong core control reduces spinal load when carrying weight on your shoulders.
Sample workouts that center lunges
Beginner session: after a short dynamic warm-up, perform 3 sets of 8–10 reverse lunges per leg using bodyweight or light dumbbells, followed by 2 sets of single-leg Romanian deadlifts and 2 sets of banded lateral walks for 12–15 reps. Finish with 3 sets of 30-second single-leg balance holds to reinforce stability.
Intermediate session: warm up thoroughly, then complete 4 sets of 6–8 forward lunges per leg with dumbbells, 3 sets of Bulgarian split squats for 8–10 reps, and 3 sets of glute bridges for 10–12 reps. Finish with 2 high-quality sets of walking lunges for 20 steps total to build endurance and coordination.
Advanced session: start with heavy barbell lunges for 3–5 sets of 4–6 reps per leg, then perform tempo Bulgarian split squats (3 seconds down, 1-second pause) for 3 sets of 6 reps. Add accessory single-leg Romanian deadlifts and core anti-rotation work, and place lunges earlier in the workout when your strength is fresh.
Equipment options and how they change the movement
Bodyweight lunges are ideal for beginners, rehabbing athletes, and high-rep conditioning. Holding dumbbells keeps the spine more neutral and is easier to scale than a barbell; dumbbells are my default recommendation for most people progressing from bodyweight.
Barbell lunges increase absolute load and are useful for strength development, but they require a sound carry and balance pattern. A front-loaded position (barbell in front rack) shifts the center of mass forward and reduces lumbar stress for some lifters, while a rear-slung barbell increases hip loading.
Smith machines, TRX-assisted lunges, and kettlebell variations all have their place: choose the tool that helps you maintain technique while achieving your training goal. For example, TRX-assisted lunges are excellent during rehab phases to build proprioception without full weight bearing.
Real-life coaching: how I corrected a client’s lunge pattern
A few years ago I worked with a recreational runner who had persistent right-knee discomfort despite regular strength work. The fault was subtle: a short stride and forward torso lean that pushed knee tracking forward and created disproportionate patellofemoral stress on the right side.
We spent two weeks on reverse lunges, lightweight paused lunges, and ankle mobility drills, and I had him film sets from the side and front. In short order, the stride length normalized, his torso remained upright, and the knee pain diminished as the quads and glutes learned to share load appropriately.
That experience reinforced a principle: sometimes the quickest path to better performance is to simplify, address mobility, and re-teach the movement before loading it up. Patience in the early stages pays off with faster progress and fewer setbacks later.
When to include lunges in your training week
Place lunges early in a lower-body or full-body session if they are a main strength focus so you tackle them fresh and technically precise. Use them later in the workout or on accessory days if you’re prioritizing heavier compound lifts like squats or deadlifts earlier.
For athletes, one or two focused lunge sessions per week combined with plyometrics and sport practice often provides an ideal balance of strength and power. For aesthetic goals, you can tolerate slightly higher weekly volume split across 2–3 sessions while monitoring recovery and joint response.
Recovery matters: if you do heavy unilateral work one day, avoid high-volume single-leg drills the next. Schedule accessory unilateral work on separate days or reduce intensity to allow tissues and the nervous system to adapt.
Tracking progress: objective and subjective markers
Use objective measures like load increases, rep completions, or improved balance time to track progress. For example, increasing dumbbell load by 5–10% or adding two extra reps per set indicates meaningful adaptation.
Subjective markers are valuable too: reduced joint discomfort, better perceived stability, and cleaner movement on video all show improvement. Keep a simple training log that records load, reps, and a short note on form so you can spot regressions early.
Consider periodic performance tests, such as single-leg hop distance or timed walking lunge sets, to capture functional gains that translate to daily activities and sports performance.
Common myths about lunges
Myth: lunges are bad for the knees. Reality: when performed with proper alignment, lunges are safe and can improve knee function by strengthening the muscles that support the joint. Problematic knee pain typically stems from poor form, mobility restrictions, or excessive load increases.
Myth: you must keep the front knee behind the toes at all costs. Reality: some forward knee travel is natural and depends on limb proportions and ankle mobility. The priority is controlling the descent and distributing force through the hip and knee rather than an absolute position rule.
Myth: lunges won’t build muscle as well as squats. Reality: lunges offer excellent unilateral stimulus and hypertrophy potential when loaded and progressed properly. They complement, not replace, other compound lifts in a balanced program.
Indicators you should regress the exercise
If you experience sharp or focal joint pain — especially inside the knee or deep hip pain — regress immediately and reassess mobility, technique, and load. Pain that persists despite regression warrants professional evaluation to rule out structural issues.
Technical breakdowns like consistent knee collapse, forward torso lean that resists correction, or inability to reach target depth after a few warm-up sets signal that you should lower the load and rebuild control through accessory work. Volume that creates lingering soreness and performance drops is another sign to back off.
If balance issues cause repeated loss of control and unsafe stepping patterns, use supported variations or reduce range of motion while strengthening the stabilizing musculature. Small, consistent improvements will build robust single-leg capacity over weeks and months.
Simple warm-up sequence for lunge-focused sessions
Begin with 5–8 minutes of general movement — walking, cycling, or a light jog — to raise core temperature and circulation. Follow that with dynamic hip swings, leg swings, and ankle circles to prime mobility in the joints you’ll use most.
Do 2–3 sets of movement-specific activations: bodyweight reverse lunges for 8–10 reps per leg, banded lateral walks for 10–15 steps, and 6–8 glute bridges. Finish with a couple of gradually heavier warm-up sets of the targeted lunge variation to solidify technique before working sets.
This sequence rarely takes more than 10–12 minutes and significantly improves performance and safety by preparing muscles, tendons, and the nervous system for the demands ahead.
Quick checklist to run through before every lunge set
- Foot placement: hip-width base and firm contact with the ground.
- Core bracing: moderate tension, not breath-holding panic.
- Torso position: chest up, neutral spine.
- Knee tracking: align over the second toe and avoid inward collapse.
- Weight distribution: press through the heel of the front foot on ascent.
Go through that checklist quietly between sets to keep technique consistent as fatigue accumulates. A small cue can prevent form erosion and reduce the chance of irritation or injury.
Where lunges fit in long-term training
Over months and years, lunges provide reliable unilateral volume that supports balanced leg development and functional strength. They adapt well to phased programming — for example, a hypertrophy block with higher reps, followed by a strength block with lower reps and heavier loads, then a power block that mixes heavier lunges with explosive single-leg work.
Because lunges are versatile and accessible, they can be a stabilizing element in long-term plans, returning periodically across training cycles to maintain single-leg resilience and correct emerging imbalances. Think of them as a durable tool in your training toolkit that you can dial up or down depending on your current priorities.
Track progress, respect recovery, and be willing to regress when necessary; longevity in training is about consistent improvement, not constant escalation. Lunges reward steady, patient practice far more than sporadic extreme efforts.
Take the time to practice the basic cues, use the variations that fit your goals and anatomy, and progress with intention. With consistent, mindful training, lunges will make your legs stronger, your balance steadier, and your movement more resilient — the small investment that pays off in everyday strength and athleticism.